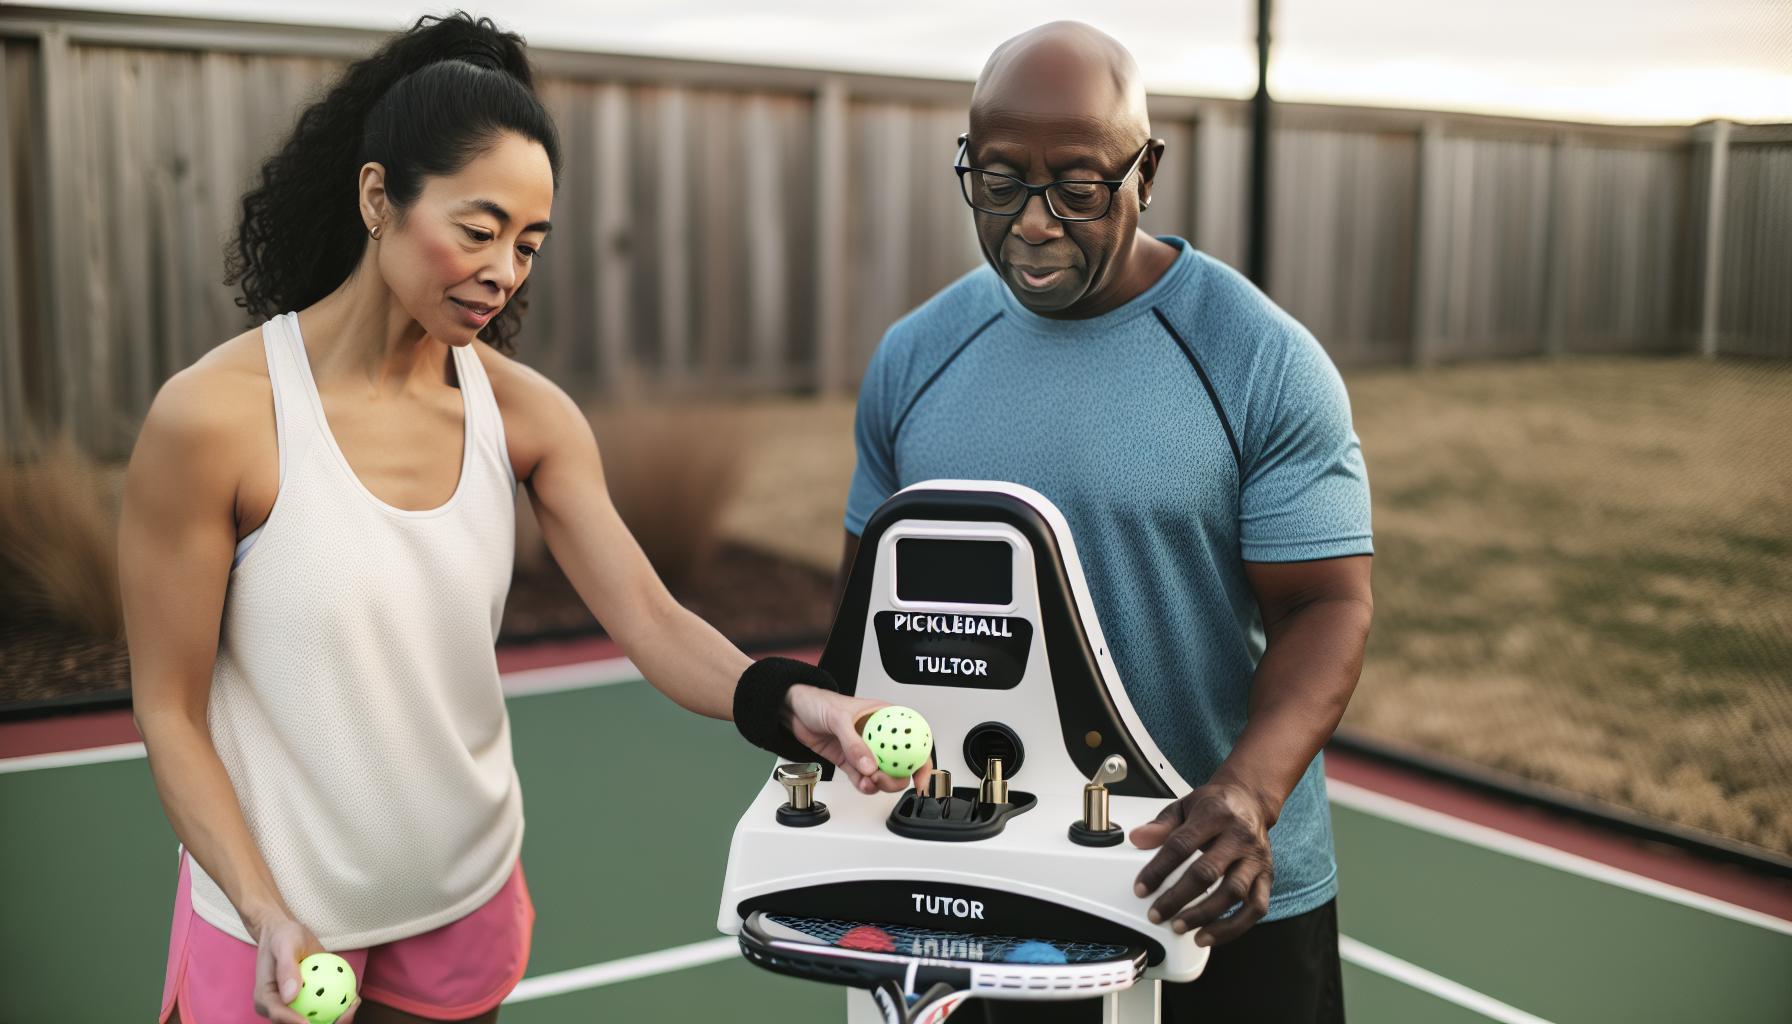
If your Pickleball Tutor machine stops feeding balls, it can quickly disrupt your practice and slow down progress. This common issue often stems from simple mechanical or setup glitches, rather than serious defects. Understanding why the ball feed carousel isn’t turning or why balls aren’t launching helps you troubleshoot efficiently and get back to consistent training. Whether you’re a beginner honing basic strokes or an advanced player refining your technique, a smoothly working ball machine remains a valuable training partner. By addressing key factors like the feed position, remote activation, and machine controls, you can resolve feed problems without costly repairs or downtime. Keep reading to discover practical tips that ensure your Pickleball Tutor performs reliably, making your practice sessions more productive and enjoyable – no matter your skill level or budget.
Common Reasons Pickleball Tutor machine Won’t Feed Balls
The hiccup of your Pickleball Tutor machine refusing to feed balls can be surprisingly common, yet it often boils down to a handful of familiar issues that are easy to address once you know where to look. understanding these common causes can save you time, frustrations, and a lot of guesswork during your practice sessions. Whether you’re a weekend warrior or a competitive player, troubleshooting these can keep your drills smooth and focused on improving your game.
One frequent culprit is the ball feed carousel not rotating, which halts the delivery before it even starts. This can happen if the machine was powered off with the ball feed in the “off” position; the feed needs to be on to start rotating properly when powered back up. Also, make sure any foot-pedal remote is properly connected and engaged because the feeder won’t reactivate without it in some setups [1]. Another common snag is a misaligned or bent rubber tongue inside the machine that can jam the balls before they launch. This piece guides the balls but if it’s off-center or damaged, it disrupts the feed cycle [3].
Often, the simplest issues hide in plain sight-using unsuitable balls (such as brand new or very worn ones) affects feeding consistency since the machine is calibrated for “played” pickleballs, which have slightly different texture and weight profiles [2]. Additionally, run through your settings to confirm the feeder speed and elevation controls aren’t set to extremes that might cause jams or skipped feeds.
- Power and feed position conflicts: Ensure ball feed is “on” before powering the machine off or on.
- Mechanical obstructions: Check for bent components like the rubber tongue or any ball blockages.
- Ball condition: Use slightly used pickleballs for optimal feed consistency.
- Remote connection: Verify pedal or remote controls are correctly connected and functional.
- Settings mismatch: Avoid extremes on speed, elevation, or oscillation that interfere with smooth ball delivery.
When you keep these causes in mind, troubleshooting becomes straightforward and less daunting. This gear, after all, is designed to elevate your practice, not add hurdles. A little preventative care and basic inspection go a long way toward consistent,reliable performance that keeps you on your game.
Step-by-Step Ball Feed Troubleshooting guide
Sometimes, the smooth rhythm of your pickleball practice can come to an unexpected halt when the ball feed mechanism stops functioning. Before frustration sets in,remember that most feed failures have fixable causes that can be resolved with a bit of focused troubleshooting.Think of it as tuning your machine to sing in harmony with your game, rather than wrestling with mysterious malfunctions.
Start by verifying that the machine’s ball feed carousel is actually powered and set to “on.” This might seem obvious, but many players overlook that if the machine was turned off with the feed in the “off” position, it won’t start feeding when powered back up. Confirm that any foot-pedal or remote device controlling feed functions is properly connected and engaged, especially as some Pickleball Tutor models require the remote to trigger the feed motor[3].
Next, inspect internal components visible through the machine’s access points. One tricky but common snag is the rubber tongue inside the feed mechanism-this small but critical part guides balls toward the launch wheel. If it’s bent, misaligned, or pressing against the machine’s casing, it can jam the balls or prevent smooth rotation. Carefully realign or replace this part if needed[2]. Running a few test balls by hand can often reveal whether this is the culprit.
Also,pay attention to the condition of your pickleballs. Unlike some other ball machines,the Pickleball Tutor is tuned for “played-in” balls rather than brand new ones,as fresh balls can be slick and cause misfeeds. Similarly, using heavily worn or damaged balls might also lead to inconsistent feeding or jams.Keep a handful of moderately used balls on hand for practice sessions to maximize reliability.
Fast Troubleshooting checklist
- Power & Feed Switch: Make sure the feed switch is on before and during power-up.
- Remote Connection: verify proper attachment and engagement of any foot-pedal or remote.
- Rubber Tongue Inspection: Check for bends or misalignment; realign or replace if necessary.
- Ball Condition: Use moderately worn pickleballs designed for training machines.
- Settings Review: Avoid extreme ball speed or elevation settings that can cause feed failures.
Following these steps will often restore reliable feeding without needing complex repairs or replacements.When troubleshooting, proceed incrementally: adjust one factor at a time and retest. This approach helps isolate the problem faster and prevents unnecessary replacements that quickly eat into your practice budget.
In practical terms, these troubleshooting habits also help you better understand your Pickleball Tutor’s inner workings, making upkeep and longer-term maintenance easier. Regular checks and minor tweaks can dramatically increase your machine’s lifespan and keep your game progression uninterrupted.
| Step | Action | Expected Outcome |
|---|---|---|
| 1 | Confirm ball feed switch is “on” before powering the machine | Feed carousel starts rotating |
| 2 | Check foot-pedal remote connection | Remote activates feed motor |
| 3 | Inspect rubber tongue alignment | ball feed cleared; no jamming |
| 4 | Use moderately worn training balls | Consistent ball delivery |
| 5 | Test different ball speed and elevation settings | Optimal ball feed without skips or jams |
How to Fix Jammed or Stuck Balls Effectively
Jammed or stuck balls can bring your pickleball practice to an abrupt halt, but the good news is these issues are often straightforward to resolve with a little patience and know-how. One of the most common culprits in the Pickleball Tutor is the rubber tongue inside the feed mechanism. This small, flexible strip guides balls smoothly towards the launch wheel, but if it becomes bent, misaligned, or pressed against the machine’s casing, it can cause balls to catch and jam. Carefully inspecting this component and adjusting it back into proper alignment frequently clears the blockage and restores smooth feeding.In certain specific cases, replacing the rubber tongue altogether is a budget-pleasant fix that avoids more costly repairs down the line[2].
Beyond mechanical parts, the balls themselves play a vital role in preventing jams. Brand-new pickleballs can be too slick and rigid for optimal feeding. Instead,rely on moderately worn balls that have softened slightly through use,providing better grip and smoother interaction with the feed system. Overly worn or damaged balls, however, are another source of feed failures. Keep your ball quality consistent by rotating your practice balls regularly-this simple step ensures steady performance and fewer interruptions.
Key Steps to Clear a Ball Jam
- Power down the machine: Safety first-always switch off and unplug before attempting any fixes.
- Open the access panel: Locate the feed mechanism to visually identify any stuck balls.
- Gently free the ball: Using your hand or a soft tool, carefully remove the jammed ball without forcing parts.
- Inspect and realign the rubber tongue: Look for bends,tears,or pressure points and adjust as needed.
- Test manually: Rotate the feed carousel by hand (if accessible) to confirm smooth ball movement before powering up again.
In addition to these manual interventions, it’s crucial to review machine settings like ball speed and elevation. aggressive settings might cause balls to feed too quickly or at awkward angles, increasing the chance of jams. dialing these back a notch can often resolve stubborn feed issues without needing hardware adjustments.
Consider this analogy: like tuning your paddle stroke for consistency, fine-tuning your Pickleball tutor’s ball path and feed rate creates harmony in practice. If jams persist despite these steps, thorough cleaning of rollers and internal surfaces often helps. Simple tools like a rubber eraser stick or compressed air can remove dust and debris that accumulate and cause feed hiccups[3].
With routine attention and these targeted troubleshooting tips, you’ll minimize interruptions and keep your drills flowing smoothly. Remember, treating your pickleball Tutor like a trusted training partner means regular tune-ups and thoughtful adjustments, not just occasional fixes after problems arise. That mindset makes juggling practice schedules and improving your game feel manageable at any skill or budget level.
Inspecting and Cleaning pickleball Tutor Components
Few things disrupt a productive pickleball practice more than a machine that suddenly stops feeding balls as it should. While mechanical faults can seem intimidating, frequently enough the root causes lie in common, easily accessible components that just need a bit of mindful inspection and cleaning. Think of your Pickleball Tutor much like your paddle-regular attention and gentle care pay dividends in performance and longevity.
As a starting point, carefully examine the feed mechanism, focusing particularly on the rubber tongue-a flexible yet crucial strip that guides balls smoothly into the launcher. This piece can gather residue or become misaligned, which causes balls to catch or jam unexpectedly.Gently cleaning this part with isopropyl alcohol and a soft brush or cloth removes sticky buildup, dust, and ball debris that accumulate over time. For stubborn gunk, a fingernail or a blue pot scrubber works well, but be cautious to avoid damaging the rubber surface[1].Beyond the rubber tongue, the feed carousel and launching wheels themselves need attention. These rotating components can attract dust, ball powder, and grime, all of which create friction and disrupt feeds. Cleaning with compressed air can clear internal dust pockets without disassembly, but a thorough wipe-down with a damp cloth and mild cleaner provides a deeper clean. Regularly inspect these parts for wear and tear as well. if the rollers become smooth or lose their texture, balls will slip rather than feed smoothly.Sometimes a gentle sanding with fine-grit paper restores grip, but replace rollers outright if they’re too worn.
Practical Cleaning and Inspection Tips
- Always power off and unplug the machine before cleaning or inspecting to avoid injury or electrical issues.
- Open access panels carefully to expose internal components without forcing any parts.
- Remove debris using a gentle scrubbing motion with a soft brush, pot scrubber, or cloth dipped in isopropyl alcohol.
- Use compressed air for hard-to-reach spots and to prevent introducing moisture to sensitive electronics.
- Examine the rubber tongue alignment and ensure it is indeed seated correctly without folds or bends disrupting ball flow.
- Check launch wheels and feed rollers for dirt or shiny wear spots and determine if light sanding or replacement is needed.
Maintenance routines like this keep your Tutor humming smoothly without costly downtime. Remember, how well you care for these components directly impacts how consistently balls are delivered during practice. For players balancing budget and performance, investing a little time in cleaning can stretch the life of your machine and enhance your training experience without breaking the bank. by visualizing these components as companions on your pickleball journey-requiring attention like any gear-you’ll gain confidence that each session is as efficient and effective as possible.
Adjusting Settings for Consistent Ball Delivery
Achieving consistent ball delivery with your Pickleball Tutor isn’t just about mechanical upkeep-fine-tuning your settings plays a pivotal role in smooth operation. Many players overlook how small adjustments to feed rate, ball speed, and elevation can dramatically improve the feeding rhythm and shot accuracy. Sometimes, what feels like a feeding jam is actually a setting mismatch causing balls to queue poorly or feed erratically.
Start by calibrating the ball feed rate carefully. If the feed is too rapid, balls might overlap or collide inside the feed mechanism, causing stoppages or misfeeds.conversely, too slow a feed may disrupt your practice flow and invite hesitation in stroke timing. Experiment with rates incrementally, aiming for a pace where balls arrive steadily but without bunching up. For most players,a moderate feed rate between 4 to 6 is ideal,but this depends on your skill level and shot type preferences-pickleball tutor settings documentation shows optimized ranges for various drills that you can use as a starting point[1].
Likewise, the ball speed setting should complement your drill intensity and recovery time on the court. Beginners benefit from slower speeds to focus on form, while intermediate and advanced players frequently enough ramp up speeds to simulate game-like pressure. Remember that higher speeds demand more from your feed mechanism and can expose minor feed inconsistencies, so adjust ball feed rate accordingly to avoid jams.
The elevation (trajectory) knob is another critical element.Setting the machine to shoot consistently low and predictable ball arcs helps maintain smooth feeding, as errant or overly high shots sometimes cause unusual ball movements that disrupt the feed. If you notice inconsistent elevations or balls bouncing prematurely,reset elevation to a neutral midpoint,then fine-tune in small increments based on your drill’s target zones.
Tips for Fine-Tuning Your Settings
- Adjust one setting at a time. Changing ball speed, feed rate, and elevation simultaneously can mask which adjustment actually affects delivery quality.
- Use preset drill settings. The Pickleball Tutor offers recommended configurations for common shots like dinks, drives, and dropshots-use these as benchmarks and tweak slightly to fit your environment.
- Account for ball condition. used balls often feed more smoothly than brand new ones, so match your settings to ball type to minimize feeding errors.
- Leverage oscillation carefully. While oscillation adds variation, it can increase complexity in ball delivery. Start with oscillation off until you have stable feed, then introduce it to sharpen reaction skills.
Calibration takes patience but pays dividends in the reliability of your practice sessions. Picture your machine as a partner: clear communication via settings helps maintain a rhythm, enabling you to build consistent strokes without interruption. This methodical approach supports all player levels-from recreational hitters eager to improve consistency, to tournament competitors seeking precise shot repetition.
| Setting | Recommended Range | Effect on Feeding |
|---|---|---|
| Ball Feed Rate | 3 – 7 (adjust by drill type) | Controls how frequently balls are loaded; too fast can cause jams, too slow can disrupt timing. |
| Ball Speed | 2 – 7 MPH depending on skill & drill | Affects how fast balls exit machine; higher speeds require careful feed rate adjustment. |
| Elevation | 1 – 7 (low to high arc) | Determines shot trajectory; stable elevations prevent erratic ball behavior in feed. |
Experiment with these adjustments in your practice warm-up. If you consistently notice feed problems at a specific setting,it might signal maintenance needs like cleaning or part replacement. By mastering this balance, your Pickleball Tutor will reliably deliver the balls, leaving you free to focus solely on honing your game.
For those ready to advance further, models like the Pickleball tutor Spin and Plus offer finer speed and spin control, which may provide even smoother feeding under more varied training conditions[3]. However, for most players, thoughtful setting adjustments paired with regular maintenance remain the cornerstone of a dependable ball feeding experience.
Replacing Worn or Damaged Parts on your Tutor
Replacing parts on your Pickleball Tutor can transform a frustrating feeding issue into smooth, reliable performance-sometimes the difference between a great practice session and wasted time is simply swapping out a worn component. Over time, frequent use wears down key elements like feed wheels, remotes, or springs, which directly affects ball delivery consistency.Recognizing when parts need replacement and understanding the best options for your skill level and budget ensures your Tutor stays game-ready.
Regular users often notice subtle signs before outright failure: feed wheels might become slick or cracked, causing balls to slip or jam; remotes may lose responsiveness or develop button lag; springs and internal mechanisms can weaken, leading to erratic ball feeds. Identifying these symptoms early means less downtime and avoids compounding mechanical stress. As an example, if your Tutor’s feed wheels no longer grip the balls firmly, replacing them with genuine Sports Tutor parts is a cost-effective fix that restores feeding precision instantly.
Key Parts Worth Monitoring and Replacement Options
- Feed Wheels: These rubberized wheels control ball propulsion. Choose replacements formulated for your exact Tutor model (Plus, Spin, Ultra, or original).Wearing down feed wheels drastically lowers feed consistency.
- Remotes: Two-button remotes-available in gray or blue according to your machine-may develop button issues over time.Investing in a fresh remote can resolve unexpected feed stopping or control lag [2].
- Springs and Internal Hardware: Springs lose tension gradually, affecting feeding force.Replacing them requires a bit more mechanical skill but extends machine life. Use original parts for best fit and durability.
- battery packs and Chargers: Though not mechanical, batteries degrade, causing feeding dropouts. External battery packs or smart chargers are useful upgrades to ensure uninterrupted sessions.
| Part | Typical Cost (USD) | Replacement Frequency | skill Level for DIY |
|---|---|---|---|
| Feed Wheels | $40 – $75 per set | 12-18 months (heavy usage) | Beginner to Intermediate |
| Remote Control (2-button) | $50 | 2+ years or as needed | Beginner |
| Springs & Internal Hardware | $15 – $35 | 2+ years / maintenance-dependent | Intermediate |
| Battery packs / Chargers | $65 – $195 | 1-3 years | Beginner |
Practical Tips for Part Replacement
- Match parts to your exact Tutor model. The Pickleball Tutor family includes base, Spin, Plus, and Ultra versions-parts are not always interchangeable. Confirm color and model details before ordering.
- Use authorized dealers or direct manufacturer channels. This avoids counterfeit or low-quality parts that shorten equipment life. For example, Sports Tutor offers a range of official replacement parts and accessories online [2].
- Follow clear installation instructions. Many parts come with detailed guides. When in doubt, video tutorials or community forums-especially from experienced players or club coaches-are invaluable.
- Keep spares on hand if you practice frequently. sudden failures are less disruptive if you can swap parts quickly,especially remotes and feed wheels.
Updating worn components is more than maintenance-it’s about optimizing your practice and extending the life of an investment that pays back in thousands of perfected shots. Whether you’re a casual player working on consistent dinks, or a tournament competitor refining precision drives, staying proactive with part replacement means fewer interruptions and more court time focused on the game.
If you’re facing persistent feeding issues despite cleaning and setting tweaks,replacing worn parts is frequently enough the fastest path back to smooth operation. Don’t let a failing feed wheel or an old remote slow your progress. Embrace gear care like you do technique: deliberate, consistent, and informed. Your Tutor will thank you-and so will your game.
Preventive Maintenance for Reliable Machine Performance
Pickleball Tutor machines can become your most reliable practice partner when given consistent care. Regular maintenance isn’t just about avoiding breakdowns-it actively enhances your machine’s performance and extends its usable life. Many players overlook simple upkeep routines that can prevent feeding problems and improve shot consistency significantly. Think of your Tutor like any valuable piece of athletic equipment: the better you treat it, the better it performs when you need it most.
Small habits like clearing out dust and debris after every practice go a long way. Dust or picked-up court residue can accumulate inside feeding mechanisms and on the rubber wheels, reducing grip and causing erratic ball delivery. Wiping down your machine’s external and internal parts with a clean, dry cloth ensures sensors and moving parts remain unblocked and responsive. If you play outdoors, occasionally check for dirt or moisture that may have seeped in, as weather conditions accelerate wear and potential malfunctions.
Routine Checks That Save You Time and Money
- Inspect feed wheels for wear and tear: Look for cracks, smooth spots, or loss of tread that reduce grip. replacing wheels before they fail prevents frequent jams.
- Test remote responsiveness: Dead spots or button lag can interrupt sessions unexpectedly. keep fresh batteries handy and consider replacing remotes every couple of years.
- Keep the ball hopper clean: Residual powder,grit,or damp balls clog feeders. Remove balls regularly and clean inside the hopper with a soft brush or air blower.
- Maintain battery health: Whether using rechargeable or external packs, charge fully and avoid leaving batteries unused for long periods. Alternate batteries if you can, to maximize lifespan.
Balancing Budget with Performance Needs
For those newer to pickleball or working within a budget, focus on basic cleaning and visual part inspections after each use. This daily effort can reduce most feeding issues dramatically without additional expense. Experienced players or coaches practicing multiple times weekly may want to schedule a monthly deep-clean and replacements of consumables such as feed wheels and springs proactively.
Some Tutors require moderate mechanical skill to service springs or internal hardware thoroughly; if that’s uncomfortable,consulting professional repair services or authorized dealers ensures proper care. investing a small amount yearly in genuine replacement parts (rather than generic alternatives) often saves money down the road by reducing machine downtime and prevented damage.
| Maintenance Task | Recommended Frequency | Skill Level | Approximate Cost |
|---|---|---|---|
| Surface cleaning & Dusting | After Every Use | Beginner | Free |
| Feed Wheel Inspection | Monthly or every 18 Hours of Use | Beginner | $40 – $75 (per set) |
| Remote Battery Check / Replacement | Every 6-12 Months | Beginner | $5 – $50 (battery or remote) |
| Battery Pack Charging & Rotation | After Each Use | beginner | Varies ($65+ for packs) |
| Spring & Internal Hardware Inspection | Every 6 months | Intermediate | $15 – $35 |
Developing a maintenance mindset not only prevents frustrating mid-session breakdowns but during tournaments or critical training, your Tutor becomes a trusted extension of your skill-building. Whether juggling quick dinks or advanced drills, a smooth ball feed lets you concentrate on your technique, not on troubleshooting.
incorporate maintenance into your practice schedule like warming up on the court. By treating your machine with this kind of respect, you’ll avoid unexpected issues and maximize every practice possibility-turning repetitive feeding errors into reliable reps that elevate your game.
Using Diagnostic Tools to Identify Feeding Issues
Every machine tells a story if you know how to listen-especially when it’s not feeding balls as was to be expected. Diagnostic tools act like your Tutor’s personal health check, revealing hidden clues beneath surface symptoms. Whether you’re a weekend player or a coach juggling back-to-back drills, pinpointing feeding issues quickly saves practice time and frustration. Far from complex gadgets, many practical tools and methods can help you identify whether it’s a mechanical snag, electrical hiccup, or user settings problem.
A useful first step is to rely on simple diagnostic aids right out of the box. The Pickleball Tutor’s startup routine includes a 10-second delay before ball launch, giving you an early opportunity to observe if the ball feed carousel begins rotating properly. If it doesn’t turn, your ears and eyes become essential diagnostics-listen for motor sound, watch feed wheel movement, and check whether the machine’s sensors detect balls correctly. Sometimes the issue lies in the feed carousel not starting, often related to the foot-pedal remote needing correct connection or the feed lever being off [1[1].
For those comfortable with technical checks, a multimeter can test power flow to key components. Battery packs and internal wiring often cause intermittent or no-feed problems. Measuring voltage at the battery terminals helps isolate if the electrical system delivers enough power to the ball feed motor. If voltage is present but the motor remains idle, the problem may be between the controller and the feed wheels or within the motor itself.
Stepwise Diagnostic Tips to Sharpen Your Troubleshooting
- Check power and Remote Connection: Confirm that the machine powers on and the foot-pedal or remote control is securely connected. Faulty or loose remotes can prevent feed activation.
- Observe Mechanical Movement: Without balls loaded, power the feed mechanism to watch for smooth rotation. Stiffness or hesitation points to possible axle wear or debris causing jams.
- Test Ball Sensing: Insert a few balls and see if sensors trigger the feed cycle. If sensors fail, balls might remain stuck in the hopper without advancing.
- Inspect the Rubber Tongue and Feed Wheels: Components can shift or bend, causing feed interruption.Facebook user reports suggest the rubber tongue sometimes hits internal casing, blocking feed rotation [3[3]. Examining or gently adjusting these parts often restores steady feeding.
- Use the Manual elevation and Speed Controls: Adjusting these settings while testing feed function can reveal sensitivity issues or misalignments impacting delivery [2[2].
| Diagnostic Tool | Purpose | Skill Level | Approximate Cost |
|---|---|---|---|
| Multimeter | Check battery voltage and electrical continuity | Intermediate | $15 – $50 |
| Visual Inspection Light / Flashlight | see inside hopper and feed mechanism clearly | Beginner | Free – $20 |
| Compressed Air / Soft Brush | Clean dust and debris obstructing sensors and wheels | Beginner | $5 – $20 |
| Replacement Batteries | Eliminate power issues caused by weak or depleted cells | Beginner | $5 – $50 |
By combining observation with these tools, you gather evidence that informs your next move-be it cleaning, part replacement, or contacting support. The key takeaway is that diagnosis is often easier than repair; rapid problem identification keeps practice flowing smoothly and helps you decide when a DIY fix is enough or professional help is warranted. Embrace the process as part of your engagement with your pickleball training gear, and you’ll unlock new levels of dependability from your Tutor machine.
Upgrading Your Pickleball Tutor for Improved Functionality
Upgrading your Pickleball Tutor can be a game-changer when you’re looking to boost performance and reduce frustrating feeding interruptions. While the base model serves many players well, targeted upgrades frequently enough bring the reliability and versatility that both beginners and seasoned players crave. Whether you want more precise ball placement, longer practice sessions, or enhanced remote options, understanding your machine’s upgrade path can transform training from a routine task into a dynamic drill session.
Many players discover immediate benefits by adding external battery packs. These accessories offer extended playtime and more consistent power delivery, which addresses one common feeding issue caused by voltage drops in the standard battery. The external battery not only keeps the feed motor running steadily but also reduces the chances of sudden stops during critical practice points. Think of it as upgrading your Tutor’s stamina before you consider a full machine replacement-a cost-effective improvement for players mindful of budget.[[[2]](#2)
Another popular upgrade is the oscillation feature, found in models like the Pickleball Tutor Oscillation machine. This upgrade adds random side-to-side ball delivery that simulates real game scenarios, making your practice more engaging while simultaneously preventing repetitive wear on feeding components. Incorporating oscillation can reduce jams caused by stationary feed wheels constantly hitting the same spots and can also help you sharpen your reaction skills by varying ball placement unpredictably[[[1]](#1). For many, this functional upgrade isn’t just about fixing feeding issues but about making practice smarter and more game-relevant.
Key Upgrade Considerations
- Skill Level & Budget: Entry-level players may benefit most from battery and basic maintenance upgrades, while competitive athletes might opt for oscillation or enhanced spin control upgrades.
- Compatibility: Confirm that any accessory or upgrade package fits your Tutor model. Some features may require newer versions or specific firmware updates.
- Performance Features: Look for upgrades offering adjustable ball speed, spin (topspin/backspin), and oscillation range to tailor drills to your evolving skill set.
| Upgrade | Benefit | Skill Level | Approximate Cost |
|---|---|---|---|
| External Battery Pack | Extended battery life, consistent feeding power | Beginner to Advanced | $195 – $250 |
| oscillation Feature | Random side-to-side ball delivery, real-game simulation | Intermediate to Advanced | $1,000+ (machine model dependent) |
| Spin Control Upgrade | Topspin and backspin adjustment for varied ball trajectories | Advanced | Included in select models or add-ons (~$200+) |
Improvements like upgraded feed wheels, enhanced ball sensors, or reinforced feed levers may come bundled with new Tutor models or available as replacement parts, but they also serve as practical DIY interventions for a fussy machine. Regularly upgrading worn components prevents breakdowns and keeps your Tutor functioning at peak feeding efficiency-saving you from mid-training pauses.
Remember,the goal of upgrading isn’t simply to “fix” the machine but to align its functionality with your training goals. Small, incremental improvements can yield huge dividends in reliability and control, creating a more enjoyable and productive practice environment. When combined with diligent maintenance and troubleshooting habits, upgrades transform your Pickleball Tutor into a precision training partner built to meet your evolving needs.
User Tips for Smooth Operation During Practice
Few things can interrupt a productive pickleball practice like an unexpected feeding hiccup from your Tutor machine. Keeping the feed smooth isn’t just about avoiding frustration; it’s about maximizing every moment you spend sharpening your skills. Whether you’re a beginner aiming to build consistency or an advanced player fine-tuning specific shots, adopting a few savvy habits during operation can make a real difference in how reliably your machine performs on the court.
- Pre-Practice Setup: Always start by checking that your pickleballs are clean and free of scuffs or dirt.Dirty balls can cause inconsistent traction on the feed wheels, leading to misfeeds or jams. Having a small cloth handy to wipe balls between drills helps maintain consistent delivery without expensive downtime.
- Stay attuned to Sounds and rhythm: The pickleball Tutor often gives audible clues if something’s off – listen for unusual motor strains, irregular feeding noises, or hesitation. these early warning signs let you pause, inspect, and fix small issues before they escalate into full jams. It’s like tuning in to your equipment’s “heartbeat” during practice.
- Adjust Settings Gradually: When changing ball speed, elevation, or spin during drills, make incremental adjustments rather than big jumps. Drastic setting changes can confuse the feed mechanism or cause balls to slip. If your Tutor has remote controls, keep them close to make on-the-fly tweaks smooth and immediate, avoiding interruptions.
- Use Compatible Balls Only: While tempting to use cheaper or older balls, sticking to the recommended brand and type for your Tutor ensures optimal feeding behavior. Mismatched ball hardness,weight,or surface texture frequently enough leads to feeding errors or increased wear on feed components.
Practical Tips for Continuous Smooth Operation
- Schedule Short breaks: Continuous feeding over extended sessions heats up feed motors and stretch components. Plan brief pauses every 20-30 minutes to give the machine a rest and avoid potential overheating or premature wear.
- Maintain Optimal Battery Levels: Low battery power is a common culprit behind inconsistent feeding. Before practice sessions, fully charge your internal or external battery packs. If you notice feeds slowing or stopping mid-session, swapping batteries or keeping a charged backup ready can keep drills flowing uninterrupted.[[[2]]
- Secure the Machine: Place your Tutor on a stable, level surface free from debris. Even minor tilting or rocking can change feed angles enough to cause jams.Using rubber feet or mats adds grip and dampens vibrations to promote steady ball throws.
- Keep a Small Tool Kit Nearby: Having basics like a rubber eraser stick for cleaning feed rollers, a soft brush, and a screwdriver can allow immediate fixes during practice, minimizing downtime. Frequent cleaning with simple tools is worth the small effort for consistent performance.[[[2]](#2)
Balancing Budget and Performance
Not everyone can (or needs to) invest in top-tier Tutor models or extensive upgrades.However, even budget-conscious players can maximize smooth operation by focusing on maintenance-friendly habits and gradual, targeted upgrades like external batteries or oscillation features. Match your practice goals to equipment capabilities rather than expecting one-size-fits-all perfection.Over time, these mindful practices contribute as much to feeding reliability as any new part or accessory.
Let your Tutor become more than a ball thrower; treat it as a practice partner requiring care and attention. The smoother your machine runs, the harder you can focus on shot technique and strategy-turning machine downtime into your time to sharpen fundamentals without distraction.
When to contact support or Seek Professional Repair
A ball feed issue that persists despite your best troubleshooting efforts is a strong signal that professional assistance may be necessary.When your Pickleball Tutor machine experiences repeated jams, inconsistent feeding, or unresponsive controls, it’s wise to step back and evaluate whether a deeper mechanical or electrical fault is at play. Attempting complex repairs without the right tools or expertise can result in further damage-and unexpected expenses down the line.
Start by assessing the scope of the problem: if simple fixes like cleaning rollers, adjusting the rubber tongue, or replacing worn-out balls haven’t restored smooth feeding, the next step is to reach out to the manufacturer or an authorized repair service. Most Tutor machines come with a warranty-often covering parts and labor for up to three years-so verify your coverage before paying out of pocket. Additionally, if your machine’s battery life is deteriorating or the electronic controls show erratic behavior, these issues might require specialized diagnostics and component replacement best handled by professionals[[[1]](https://pickleballcentral.com/content/tutor-spin-and-plus-manual-2021-07.pdf?srsltid=AfmBOoqL02zOwDnxvBxDFMYWzhdvIkxe4_FkvQAuNcZGZxsru2wZWewv).
For those balancing budget concerns with practice needs, consider that many regional pickleball clubs or pro shops offer repair clinics or referrals, often at lower cost than mailing machines back to the manufacturer. Sharing symptoms and detailed descriptions in official user groups, like the Pickleball Tutor Facebook community, can also help isolate issues before committing to repairs[[[2]](https://www.facebook.com/groups/1500384803612289/posts/3832716137045799/).
Signs it’s time to consult experts include:
- Recurrent jams after cleaning and routine maintenance
- Ball feed motor grinding, stalling, or overheating
- Irregular or no response from control panel or remote
- Visible damage to key parts like the rubber tongue or drive rollers
- Unexpected error messages or failure to power on
Invoking professional assistance also helps preserve resale value, especially for higher-end models. When you do contact support,having facts like the machine’s purchase date,model,and detailed history of troubleshooting steps accelerates the process.
Remember, reliable ball feeding is critical to maximizing your training time and improving skills.Don’t hesitate to get help so you can get back on court with confidence, whether you’re refining your serves or rallying at full speed. A well-maintained Tutor is more than equipment-it’s your dedicated practice partner.
Frequently asked questions
Q: Why does my Pickleball Tutor machine start but not feed balls?
A: This issue often occurs because the ball feed carousel is not engaged. ensure the ball feed switch is in the “on” position after powering on. Also, check if the foot-pedal remote is connected and active, as it controls the ball feed mechanism independently from the power switch [2]. For detailed steps, refer to the troubleshooting section in your user manual.
Q: How can I tell if the Pickleball Tutor’s ball feed motor is malfunctioning?
A: If the machine powers on but the feed carousel doesn’t rotate, the feed motor might potentially be faulty. Listen for humming or no sound when activated. Inspect the motor for blockages, and clean any sand or debris. Testing with a multimeter can confirm electrical issues. For replacement guidance, see the parts maintenance section in your manual [3].
Q: What cleaning methods help maintain consistent ball feeding in a Pickleball Tutor?
A: Regularly clean the ball feed carousel and rollers using a soft, lint-free cloth or a rubber eraser stick to remove dirt and debris. Dirty rollers or feed mechanisms cause inconsistent or stopped ball feeding. Performing routine cleaning after every 10+ outings extends machine life and improves performance Q: Can battery issues cause the Pickleball tutor machine to stop feeding balls?
A: Yes, low or improperly charged batteries frequently enough cause feeding failures. Ensure your battery is fully charged and correctly installed. If using an AC adapter, verify power supply stability. Check the battery indicator on the control panel to monitor charge status[3]. A: Using worn, damaged, or improperly sized balls can cause jams and feeding issues. Always use pickleballs recommended by the manufacturer with consistent quality. Dirty or cracked balls can get stuck in the feed carousel, disrupting ball delivery [3]. A: Adjust ball speed and feed rate settings gradually to match the ball condition and playing surface. Excessive speed or feed can cause jams. Also,calibrate the elevation and oscillation features carefully to maintain smooth ball delivery without interruptions [3]. Review the “Adjusting Settings for Consistent Ball Delivery” section for best practices. A: Replace worn rollers, feed motors, or belts if cleaning and setting adjustments don’t resolve feed issues. Signs include irregular ball release, unusual noises, or visible mechanical wear.Use only OEM replacement parts to maintain performance and warranty coverage.Consult the manual’s maintenance section for replacement procedures [3]. A: Yes, devices like multimeters can test electrical components including motors and wiring.Some advanced users use manual triggering of feed parts to isolate faults. Combining physical inspection with electrical tests improves troubleshooting accuracy [3].For complex issues, contacting professional support is recommended. For deeper insight into troubleshooting and maintenance, explore related sections on ball feed troubleshooting and maintenance in your Pickleball Tutor’s user guide. Consistent upkeep maximizes your machine’s lifespan and on-court performance! Troubleshooting your pickleball Tutor machine’s feeding issues ensures you get the most from your practice sessions, whether you’re a beginner or a seasoned player aiming to sharpen advanced skills. by addressing common causes like misaligned parts or dirty rollers, you maintain consistent ball feeds and maximize your training efficiency. Don’t wait to resolve these minor glitches-quick action keeps your equipment performing smoothly and your game progressing steadily. Ready to take your pickleball training further? Explore our guides on optimizing machine settings and advanced shot techniques to elevate your practice routine. Also, check out our detailed equipment reviews comparing budget-friendly options with premium gear to find what fits your style and needs best. For ongoing tips, sign up for our newsletter and join a community of players committed to mastering every aspect of pickleball. If you have questions or experience different issues with your ball machine, share your experience in the comments below.Your feedback helps us build a trusted resource tailored to pickleball enthusiasts of all levels.Keep your Pickleball Tutor running flawlessly, and let’s keep improving your game-one feed at a time! Q: How does ball condition affect the Pickleball Tutor ball feed function?
Q: What settings adjustments improve ball feed consistency on the Pickleball Tutor?
Q: When should I replace parts on my Pickleball Tutor to fix feeding problems?
Q: Are there any diagnostic tools to help identify feeding faults in my Pickleball Tutor?
To conclude


